Let’s be real, on a sweltering summer day, your Air Conditioner is more than an appliance; it’s your best friend. But when it starts huffing and puffing, struggling to keep up, your first instinct might be to panic. Before you call for an expensive repair, consider this: the solution might be simpler than you think. Learning How To Clean AC Outdoor Unit components is one of the most effective DIY tasks you can do to boost efficiency, lower your energy bills, and extend the life of your system. Think of it as a spa day for the hardest working machine in your home.
Your outdoor AC unit, also known as the condenser, is the workhorse of your cooling system. It’s responsible for releasing all the heat absorbed from inside your house out into the world. When it gets clogged with dirt, leaves, grass clippings, and cottonwood fluff, it can’t “breathe” properly. This forces your system to work harder, consume more energy, and wear out faster. A clean unit is a happy and efficient unit. For a deeper dive into the specific components, understanding how to clean air conditioner coils is a great place to start, as the outdoor unit is essentially one giant coil.
Why Bother Cleaning Your AC Outdoor Unit?
So, why is this chore so critical? Imagine trying to run a marathon while wearing a heavy winter coat. That’s essentially what you’re asking your dirty AC unit to do. The layer of grime acts as an insulator, trapping heat and preventing the unit from doing its job effectively.
Here’s the breakdown of benefits:
- Improved Energy Efficiency: A clean condenser can operate much more efficiently, potentially lowering your cooling costs by up to 15%. That’s real money back in your pocket every month.
- Enhanced Cooling Performance: Your home will cool down faster and more effectively, providing the sweet relief you crave during a heatwave.
- Longer System Lifespan: Regular maintenance reduces strain on the compressor, the heart of your AC system and the most expensive component to replace. By keeping it clean, you’re preventing premature failure.
- Prevents Costly Repairs: Dirt and debris can cause corrosion and other damage over time. A simple cleaning can help you spot potential issues before they escalate into major breakdowns.
Before You Start: Safety and Tools
Before you roll up your sleeves, let’s talk safety. We’re dealing with a powerful electrical appliance. Skipping the safety prep is not an option.
Expert Tip from HVAC Pro, John Carter: “I’ve seen it all. People try to hose down their unit while it’s running. It’s incredibly dangerous. Always, always kill the power at two, preferably three, locations before you even think about touching the unit. Your safety is worth the extra 60 seconds.”
Your Tool Checklist:
- Screwdriver or Nut Driver: To remove the protective grille or top panel.
- Shop-Vac or Hand Brush: For removing loose debris.
- Garden Hose with a Spray Nozzle: A gentle spray is key. Absolutely no pressure washers!
- Commercial AC Coil Cleaner: You can find this at any home improvement store. It’s formulated to foam up and break down stubborn grime without damaging the delicate fins.
- Fin Comb: An inexpensive tool for gently straightening any bent aluminum fins.
- Work Gloves: To protect your hands from sharp metal edges and dirt.
- Safety Goggles: To protect your eyes from flying debris and cleaning chemicals.
How to Clean AC Outdoor Unit: The 7-Step Guru Guide
Alright, you’ve got your tools and you’re ready to go. Follow these steps carefully for a safe and effective cleaning.
Step 1: Kill the Power
This is the most important step. You need to shut off power to the unit in two places:
- At the Thermostat: Turn your thermostat to the “Off” position.
- At the Disconnect Box: Locate the metal box on the exterior wall near your AC unit. Open it and either pull out the disconnect block or flip the switch to “Off”.
- At the Breaker Panel (Recommended): For extra safety, find the breaker that controls your AC unit in your home’s main electrical panel and flip it to “Off”.
Step 2: Clear Away Debris
Start by clearing a two-foot perimeter around the entire unit. Remove any leaves, weeds, branches, or trash that could obstruct airflow. Use your hands (with gloves on!) or a brush to clear away the larger, loose debris from the unit’s exterior.
Step 3: Remove the Top and Clean the Interior
Using your screwdriver, carefully remove the screws holding the top grille and fan assembly in place. Gently lift the fan assembly out and set it aside, being careful not to stretch or damage the electrical wires connected to it. Now, use your shop-vac or a brush to remove all the leaves and debris that have accumulated inside at the bottom of the unit.
Step 4: Clean the Condenser Fins
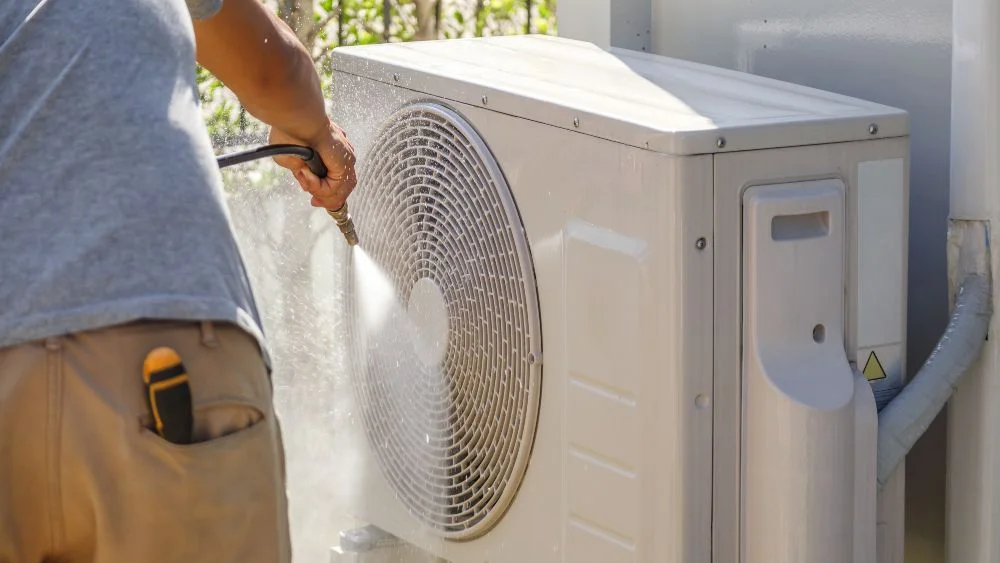
Now for the main event. From inside the unit, use your garden hose with a spray nozzle to gently spray water outwards through the fins. Start at the top and work your way down. This pushes the dirt and gunk out the way it came in, rather than forcing it deeper into the unit. Make steady, sweeping motions. You’ll be amazed at how much gunk comes out.
Step 5: Apply the AC Coil Cleaner
Once the initial rinse is done, it’s time for a deep clean. Read the instructions on your AC coil cleaner. Typically, you’ll spray the foam liberally onto the exterior of the fins and let it sit for 10-15 minutes. The foam will expand, get deep into the crevices, and chemically break down the stubborn grime. After the recommended time, rinse it all away thoroughly with your hose, again from the inside out.
Step 6: Straighten Any Bent Fins
Look closely at the aluminum fins. It’s common for them to get bent by hail, flying debris, or accidental bumps. Bent fins restrict airflow just like dirt does. Carefully use your fin comb to gently straighten them back into place. This takes a bit of patience but makes a big difference. While inspecting for damage, it’s also a good time to listen for any unusual sounds once the unit is running again. A rattling can point to other issues, a topic you can explore in our guide on how to fix air conditioner making noise.
Step 7: Reassemble and Power Up
Once the unit is clean and the fins are straight, it’s time to put everything back together. Carefully place the fan and top grille back on and secure the screws. Now, reverse the power-off sequence:
- Turn the breaker back on.
- Re-insert the disconnect or flip the switch in the exterior box.
- Turn your thermostat back to “Cool”.
Give your AC a few minutes to kick on. It should run quieter and more efficiently than before! Sometimes, a newly cleaned unit can reveal other underlying issues. For example, if you notice water pooling around the unit after a few hours of operation, you may want to investigate how to handle that in our guide on how to fix air conditioner leaking water.
How Often Should You Clean Your Outdoor Unit?
For most homeowners, a thorough cleaning once a year is sufficient, ideally in the spring before the cooling season kicks off. However, if you live in an area with a lot of dust, trees that shed (like cottonwoods), or frequent mowing, you might want to check and rinse it down every couple of months. Regular maintenance is key, and knowing when to call a professional for more complex tasks is also important. For instance, tasks like checking refrigerant levels are not DIY jobs, and for those who are curious, we have content that explains how to recharge air conditioner freon from a professional’s perspective.
Frequently Asked Questions (FAQ)
Q: Can I use a pressure washer to clean my AC unit?
A: No, absolutely not. A pressure washer is too powerful and will bend or flatten the delicate aluminum fins, severely restricting airflow and causing more harm than good. A standard garden hose with a spray nozzle is all you need.
Q: Do I need to clean the inside of my AC unit too?
A: Yes, this guide covers the outdoor condenser unit. You should also regularly change the air filter in your indoor unit (the furnace or air handler) every 1-3 months. Cleaning the indoor evaporator coils is a more complex job that is often best left to a professional.
Q: What if my AC still isn’t cooling well after cleaning?
A: If a thorough cleaning doesn’t improve performance, you may have a more serious issue, such as a refrigerant leak, a failing capacitor, or a faulty compressor. At that point, it’s time to call a qualified HVAC technician.
Q: Is the commercial coil cleaner safe for my plants and lawn?
A: Most commercially available coil cleaners are formulated to be biodegradable and safe for plants when diluted with water during the rinsing process. However, it’s always a good idea to pre-rinse any nearby vegetation and rinse it again thoroughly after you’re done cleaning the unit.
Q: How long does it take to clean an AC outdoor unit?
A: For a first-timer, set aside about an hour to be safe and thorough. Once you get the hang of it, you can likely complete the entire process in 30-45 minutes.
Your AC Will Thank You
Taking the time to how to clean AC outdoor unit is a small investment that pays huge dividends in comfort, savings, and peace of mind. You’ll not only enjoy a cooler home but also the satisfaction of a job well done. By making this simple task part of your annual home maintenance routine, you’re ensuring your system runs at peak performance when you need it most. So go on, give your AC the TLC it deserves! If you have any questions or your own tips to share, drop them in the comments below.